
Crinoline - Petticoat Re-fluff-a-tation
There must be a dozen ways to fix a slip that has lost its lift or to give more bounce to a thin slip. The only one that will not wash out or flake off is fish line. This is not really any more time consuming than some other methods and it will not have to be redone ever again. Control the amount of lift by the size/weight of the fish line. This will work on any slip, any fabric.
Materials
1. Fish line - 20 lb. test, 30 lb. test and 60 lb. test. - Buy the cheapest that is available, it has more spring. The more expensive type is softer and limper.
2. Invisible sewing thread - If the invisible thread is on a regular spool it should be put on a vertical spool pin so that the spool turns as the thread unwinds. The thread will not kink or twist. If the thread is on a cone it is wound for the thread to come off the top. It should be placed on a horizontal spool pin or on a thread stand. Cover the cone with a thread net. This will keep it from getting tangled both when it is on and off the machine. When not in use wrap the bobbin and spool with painter’s tape to keep them from unwinding.
Winding the bobbin - This type of thread stretches, so you have to be careful. Do not put the it through all of the thread guides. Start winding and feel the tension just in front of the bobbin. It should be loose. You can pinch the thread with your fingers and guide it on to the bobbin. Wind at a medium speed. This will take forever. This thread is so fine that it takes twice as much to fill the bobbin. Only wind the bobbin about half full. Over filling a plastic bobbin can cause it to break. (Voice of Experience)
Thread the machine as usual. Turn the tension to the lowest setting. Yes, I know, that seems backward. The thread is so fine you would think the tension would need to be increased. The tension needs to be looser to keep the thread from stretching. Color the end of the thread with a Sharpie marker to make it more visible.
3. 80 or 90 sharp needle - Set your machine for 10 per inch (2.5 mm) stitch length and a small zig zag. Use a regular sewing foot or an applique foot.
4. A boom box, a stack of favorite CDs and a cup of coffee. This will take a while, but the results are worth it.
Set Up
1. Put the fish line to the right of the machine. It needs to be in a box or holder so that it winds off straight, like toilet paper. If it sits on the flat side and spirals off it will twist and kink. Pull several yards loose and let them lie on the floor. Trying to pull the fish line off of the reel while sewing doesn't work, it will be too tight. Keep the cat out of the room while doing this.
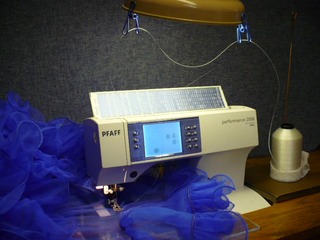
2. The easiest way to get the fish line to the presser foot is to run it through a clip attached to the work light over the machine. If there isn't a work light consider getting one. Did you know that twice as much light is needed for sewing compared to reading? Thread the fish line through the clip and directly down in front of the machine to the presser foot.
3.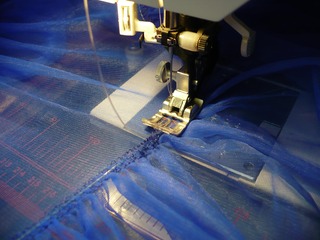 Once the fish line is started under the presser foot it will not have to be guided. It will slip between the toes of the foot. Look for a presser foot that has a groove running front to back. This will allow the foot to ride straighter on the ridge of the fish line and the seam. This is usually an applique or a button hole foot.
4. Start with 20 lb. test fish line on the bottom edge of the slip. If there is a rolled hem at the bottom of the slip just sew over it. If the bottom is a raw edge a rolled hem foot can be used. Slide about six inches of fish line under the foot so that there is something to hold on to. Place the bottom edge of the slip under the foot and under the fish line. Take a sip of coffee. Start sewing.
5. To prevent the slip from gathering on the fish line, a possible problem, hold the slip behind the presser foot and pull it slightly. Also make sure the fish line is running free from the reel. Stop and pull more off and let it lie on the floor. Put a clothes pin on the edge of the slip where you start sewing and sew for about two yards. Stop, with the needle down, and lift the presser foot. Run your fingers down the edge of the slip toward the machine to chase out any gathers, and then pull more fish line through and under the foot as needed. Lower the presser foot. Place a second clothes pin behind the presser foot where you stopped. Sew for a ways and check for gathers. Depending of the machine and the type of slip being worked on, this step might not be necessary. Keep moving this second clothes pin forward as you sew. The first clothes pin will show you how far you have gone. When you get to the end overlap the stitching for a couple of inches and trim off the excess fish line.
5. If there is lace or a ruffle on the bottom edge of the slip you can sew the fish line right above it. This works for the soft nylon type of slip. They are still soft and pack well, but fluffier.
6. Use the 20 lb. test fish line on the bottom of the slip. The 30 lb. test on the middle layers and the 60 lb. test at the top. This will lift the top of the slip and prevent that dip in the middle. Once you have done this you can determine exactly how much lift you like